|
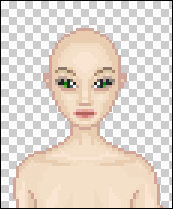
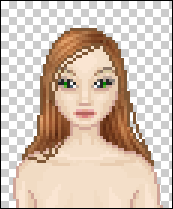
At first, choose a base,
copy it and paste it into your programme (I used one of mine, but it works
with any other kind of base, too). |
|
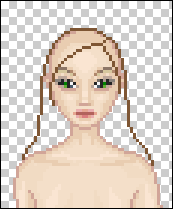
Now create a new layer,
pick the drawing tool and draw the outline of the hair with colour 1 .
Don't make it a straight line, but follow the shape of the base, like real
hair would do, unless it's a special hairstyle. .
Don't make it a straight line, but follow the shape of the base, like real
hair would do, unless it's a special hairstyle.
Don't forget to clean the lines up!
 |
|
Create another
layer and fill
the hair with colour 2 . |
|
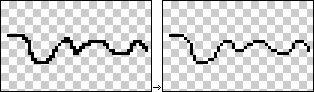
Pick the darken tool
 (size 1) and start to draw the strokes,
starting at the parting. The more strokes you make, the more realistic it
looks, but they have to be even and not too straight. (size 1) and start to draw the strokes,
starting at the parting. The more strokes you make, the more realistic it
looks, but they have to be even and not too straight. |
 |
Now
pick the lighten tool (size 1) and make
the lighter strokes. (size 1) and make
the lighter strokes. |
|
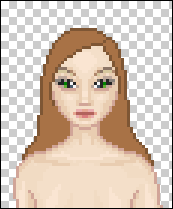
Then
you return to the darken tool (between size 5-9; opacity and hardness around
50) and go on with the shadows. They have to be at the parting, and at her
neck and shoudlers (and there where you want to have some). |

|
After that we go on with
the highlights. Pick the lighten tool (size 9) and draw the highlights there
where the light falls (choose the direction where the light comes from). Be
careful that the contrast between the shadows and the highlight isn't too
hard;
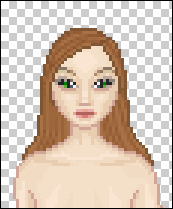
Now you're
actually done, and should be similar to the hair on the left. |
 |
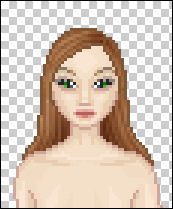
To make it more natural,
add a few single strokes with the drawing tool in colour one. Also add some
shadows right beneath her hair (on her forehead, shoulders and her neck)
|
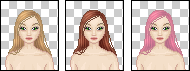 |
If you don't like the
hair colour, go to "colours/settings" and change it. |
|

|
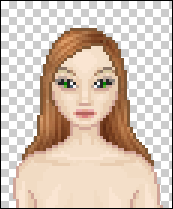
Now you're finally
finished! I hope this tutorial helped you a bit. |